



Of course, you can write your own prompts, but you can also ask ChatGPT to do it for you. That's usually faster. In this guide you'll learn how.
By the end of this guide, you'll:
- Have a ChatGPT project dedicated to making prompts.
- Make prompts quickly, based on your goal.
- Build a personal prompt library.
Note: This builds on How to Write Effective Prompts for ChatGPT (Part 1). You don't have to read it first, but if you do, you'll better understand the two kinds of prompt the builder produces: framework prompts and wizard prompts.
Why have ChatGPT create your prompts?
Writing a structured prompt yourself takes time, especially if the framework prompts and wizard prompts from Part 1 are new to you. ChatGPT can speed that up: you describe what you want, then it asks clarifying questions, works out the right structure, and writes the prompt.
That helps most with tasks you're not an expert in yourself. ChatGPT can often judge what context is needed to do the task properly, and which approach works best to reach the result you want.
You're not outsourcing your thinking. You still decide what the prompt should deliver. You just don't have to start with an empty chat window and do all the research yourself.
Before you start
- A Plus subscription is recommended.
- In Work mode, ChatGPT reads and edits files on your computer. Your library stays a local .md file that ChatGPT works with directly.
- Use the latest Sol model, set effort to High, and leave speed on Standard.
Make a prompt builder
1. Create a folder
Create a folder on your computer called "Prompt Library" and put these two files in it:
- The prompt library. Download the starter prompt library, with framework and wizard prompts plus the language-level components. Or start with an empty .md file.
- The builder instruction. Download the instruction. It tells ChatGPT how to build each new prompt.
This instruction turns ChatGPT into your prompt builder. Here's what's in it, so you know what you're running:
# Role and objective
Prompt engineer. You help me build strong, reusable prompts. Work efficiently – explain only what's needed to understand the next step or the choice of prompt.

# Context
Use the prompt library file in this folder:
- Draw on it for inspiration, and reuse a prompt where it fits.
- If you reuse one, adapt it to my goal and briefly say what you changed.

# Instructions
- Work with me toward a single, usable prompt.
- Treat the frameworks and the wizard anatomy as tools, not rigid templates.
- Don't make assumptions when information is missing – say what's still needed.
- If missing context can be inferred from the library or my earlier answers, use that before asking new questions.
- If my intent is already clear and the next step is reversible, continue without unnecessary clarifying questions.

# Process
## Step 1 — Clarify the goal and pick the prompt type
Ask what I want to achieve, for whom, and in what context. Then decide which kind of prompt fits, and tell me which and why:
- A framework prompt for a one-off task (draft an email, summarize a report, analyze a process).
- A wizard prompt for co-creating a document with me step by step (a problem statement, a plan, a proposal).

## If it's a framework prompt
1. Pick a framework as a starting point (R-T-F, R-A-C-E, R-I-S-E, or D-R-E-A-M) and say why.
2. Ask follow-up questions to fill any gaps. Let my answers shape the prompt; deviate from the framework where that makes it clearer.
3. Draft the prompt in Markdown, with headings that match the content.
4. Expand where useful: extra context or sources, steps, criteria, output rules (placement, length, structure, reading level).

## If it's a wizard prompt
1. Build it from the wizard anatomy:
   - Role – the expertise you take on.
   - Task – the one document we're building.
   - Principles – non-negotiable rules (don't invent facts, label assumptions, ask instead of guess).
   - How to work – step by step, wait for my response after each step, a few questions at a time.
   - Steps – for each: explain the concept briefly, ask, summarize, wait for my confirmation.
   - Output – the shape of the finished document.
   - Stop condition – when to stop.
2. Ask follow-up questions to fill any gaps.
3. Draft the prompt in Markdown.

## Both
Check the prompt for clarity, completeness, and reusability. State explicitly if information is missing – don't make assumptions. Then work my feedback in until we have a single final prompt.

# Output
- Deliver the final prompt in Markdown.
- Make sure it works on its own.
- When I approve the final prompt, append it to the prompt library file in this folder. Match the library's format: a short `###` heading, then the prompt in a fenced code block. Don't change or remove the prompts already there.
Note: you don't have to copy the instruction. It's already in the file you downloaded.
2. Connect the project to your folder
In a Project you group chats around one topic. In Work mode you can connect a folder on your computer to it. That keeps all your prompt-building chats together, and gives ChatGPT direct access to your two files.
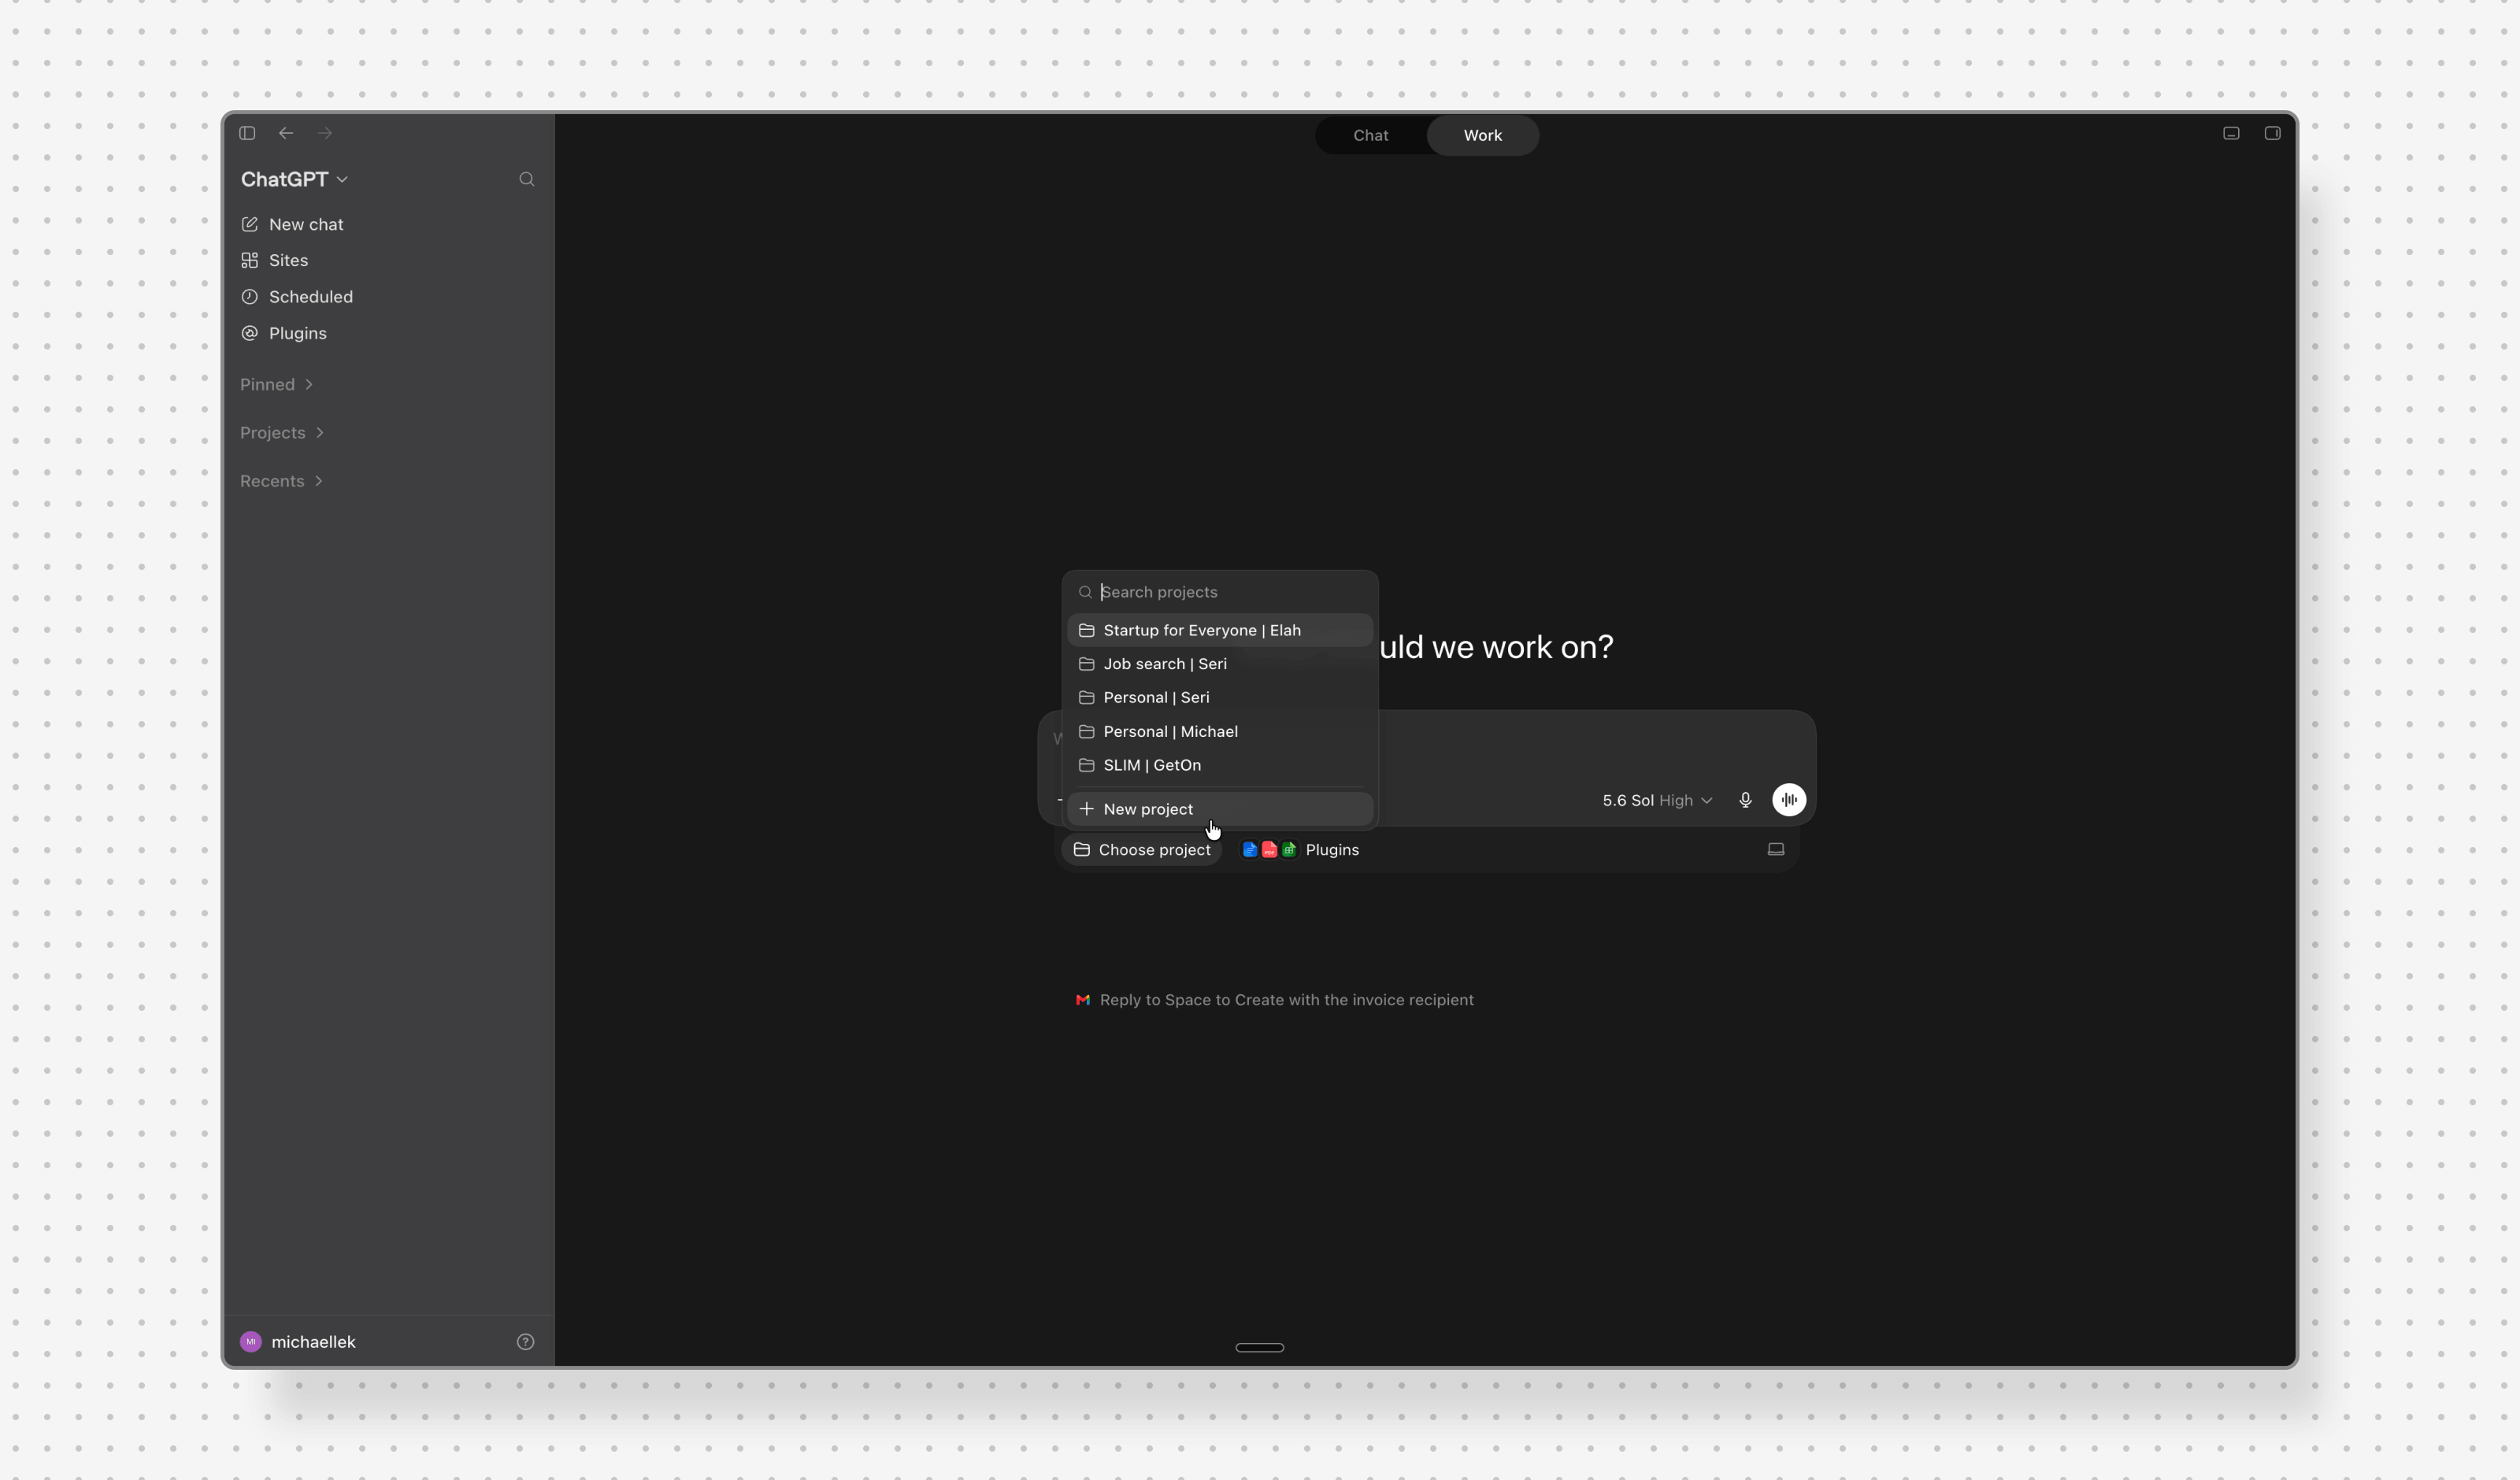
In the message box, click Choose project, then + New project.
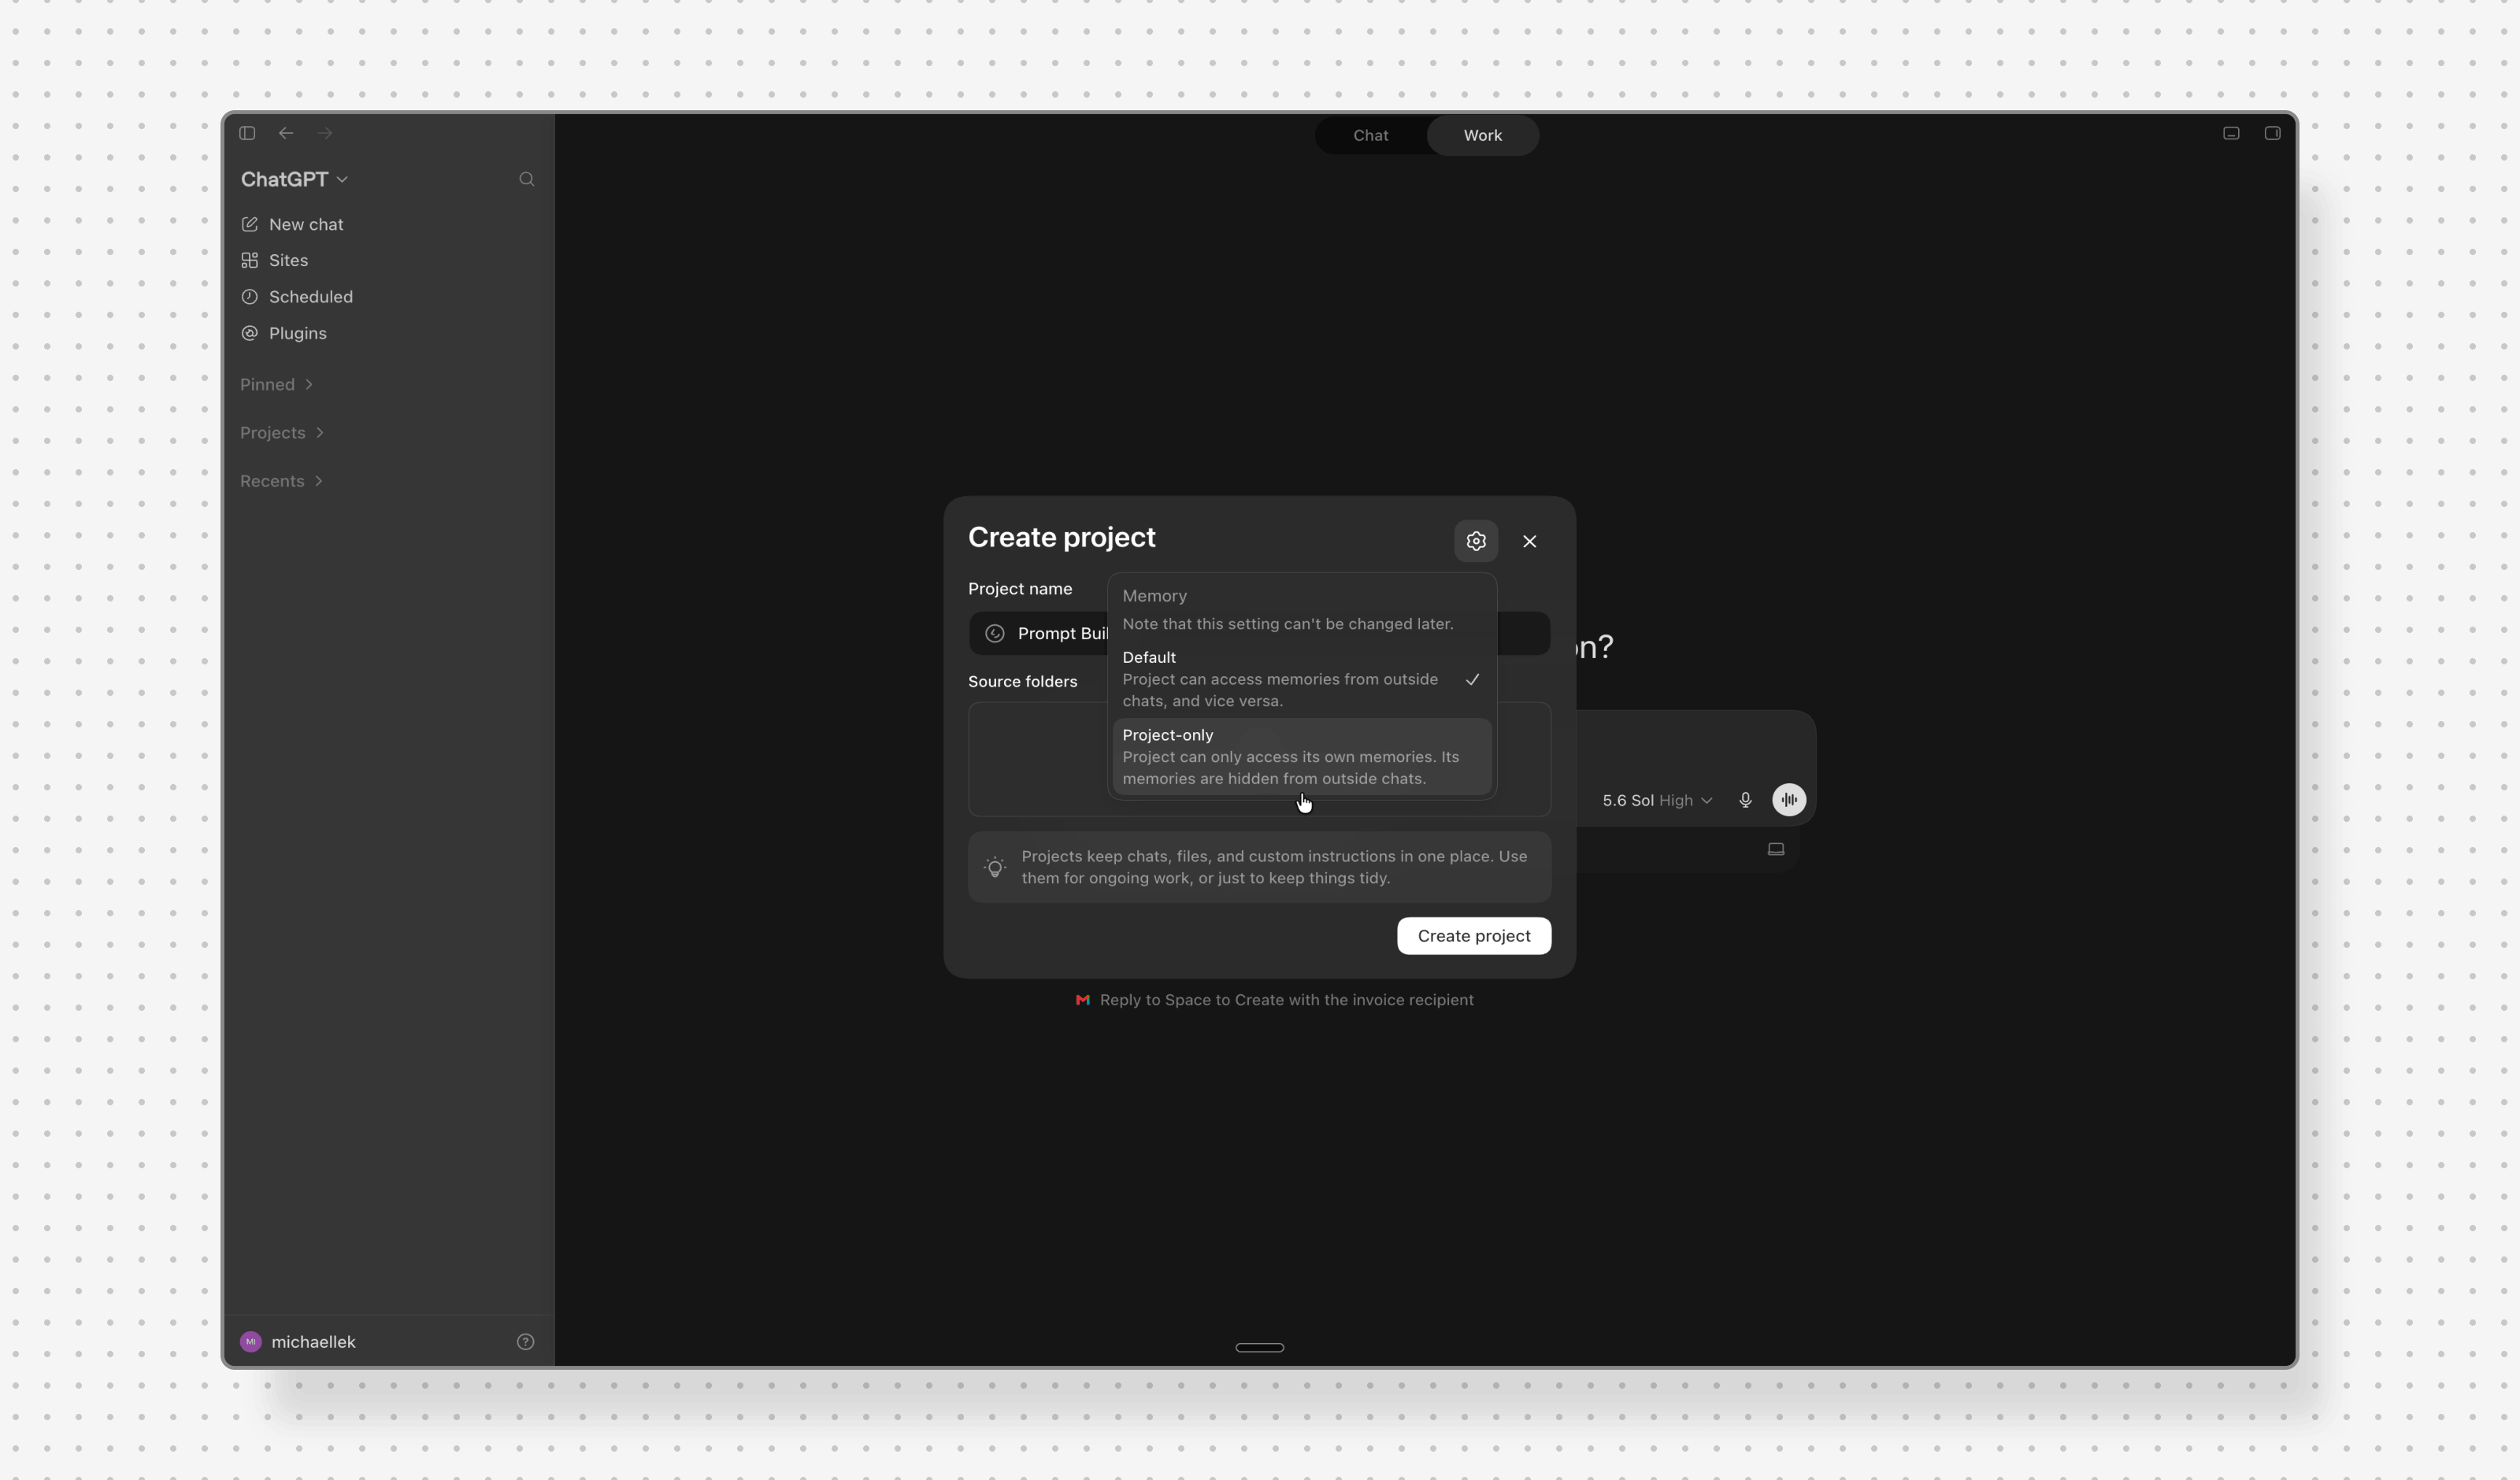
Name the project "Prompt Builder". Open the settings and set the memory to Project-only, so the project uses only its own memory, separate from your other chats. You can't change this later.
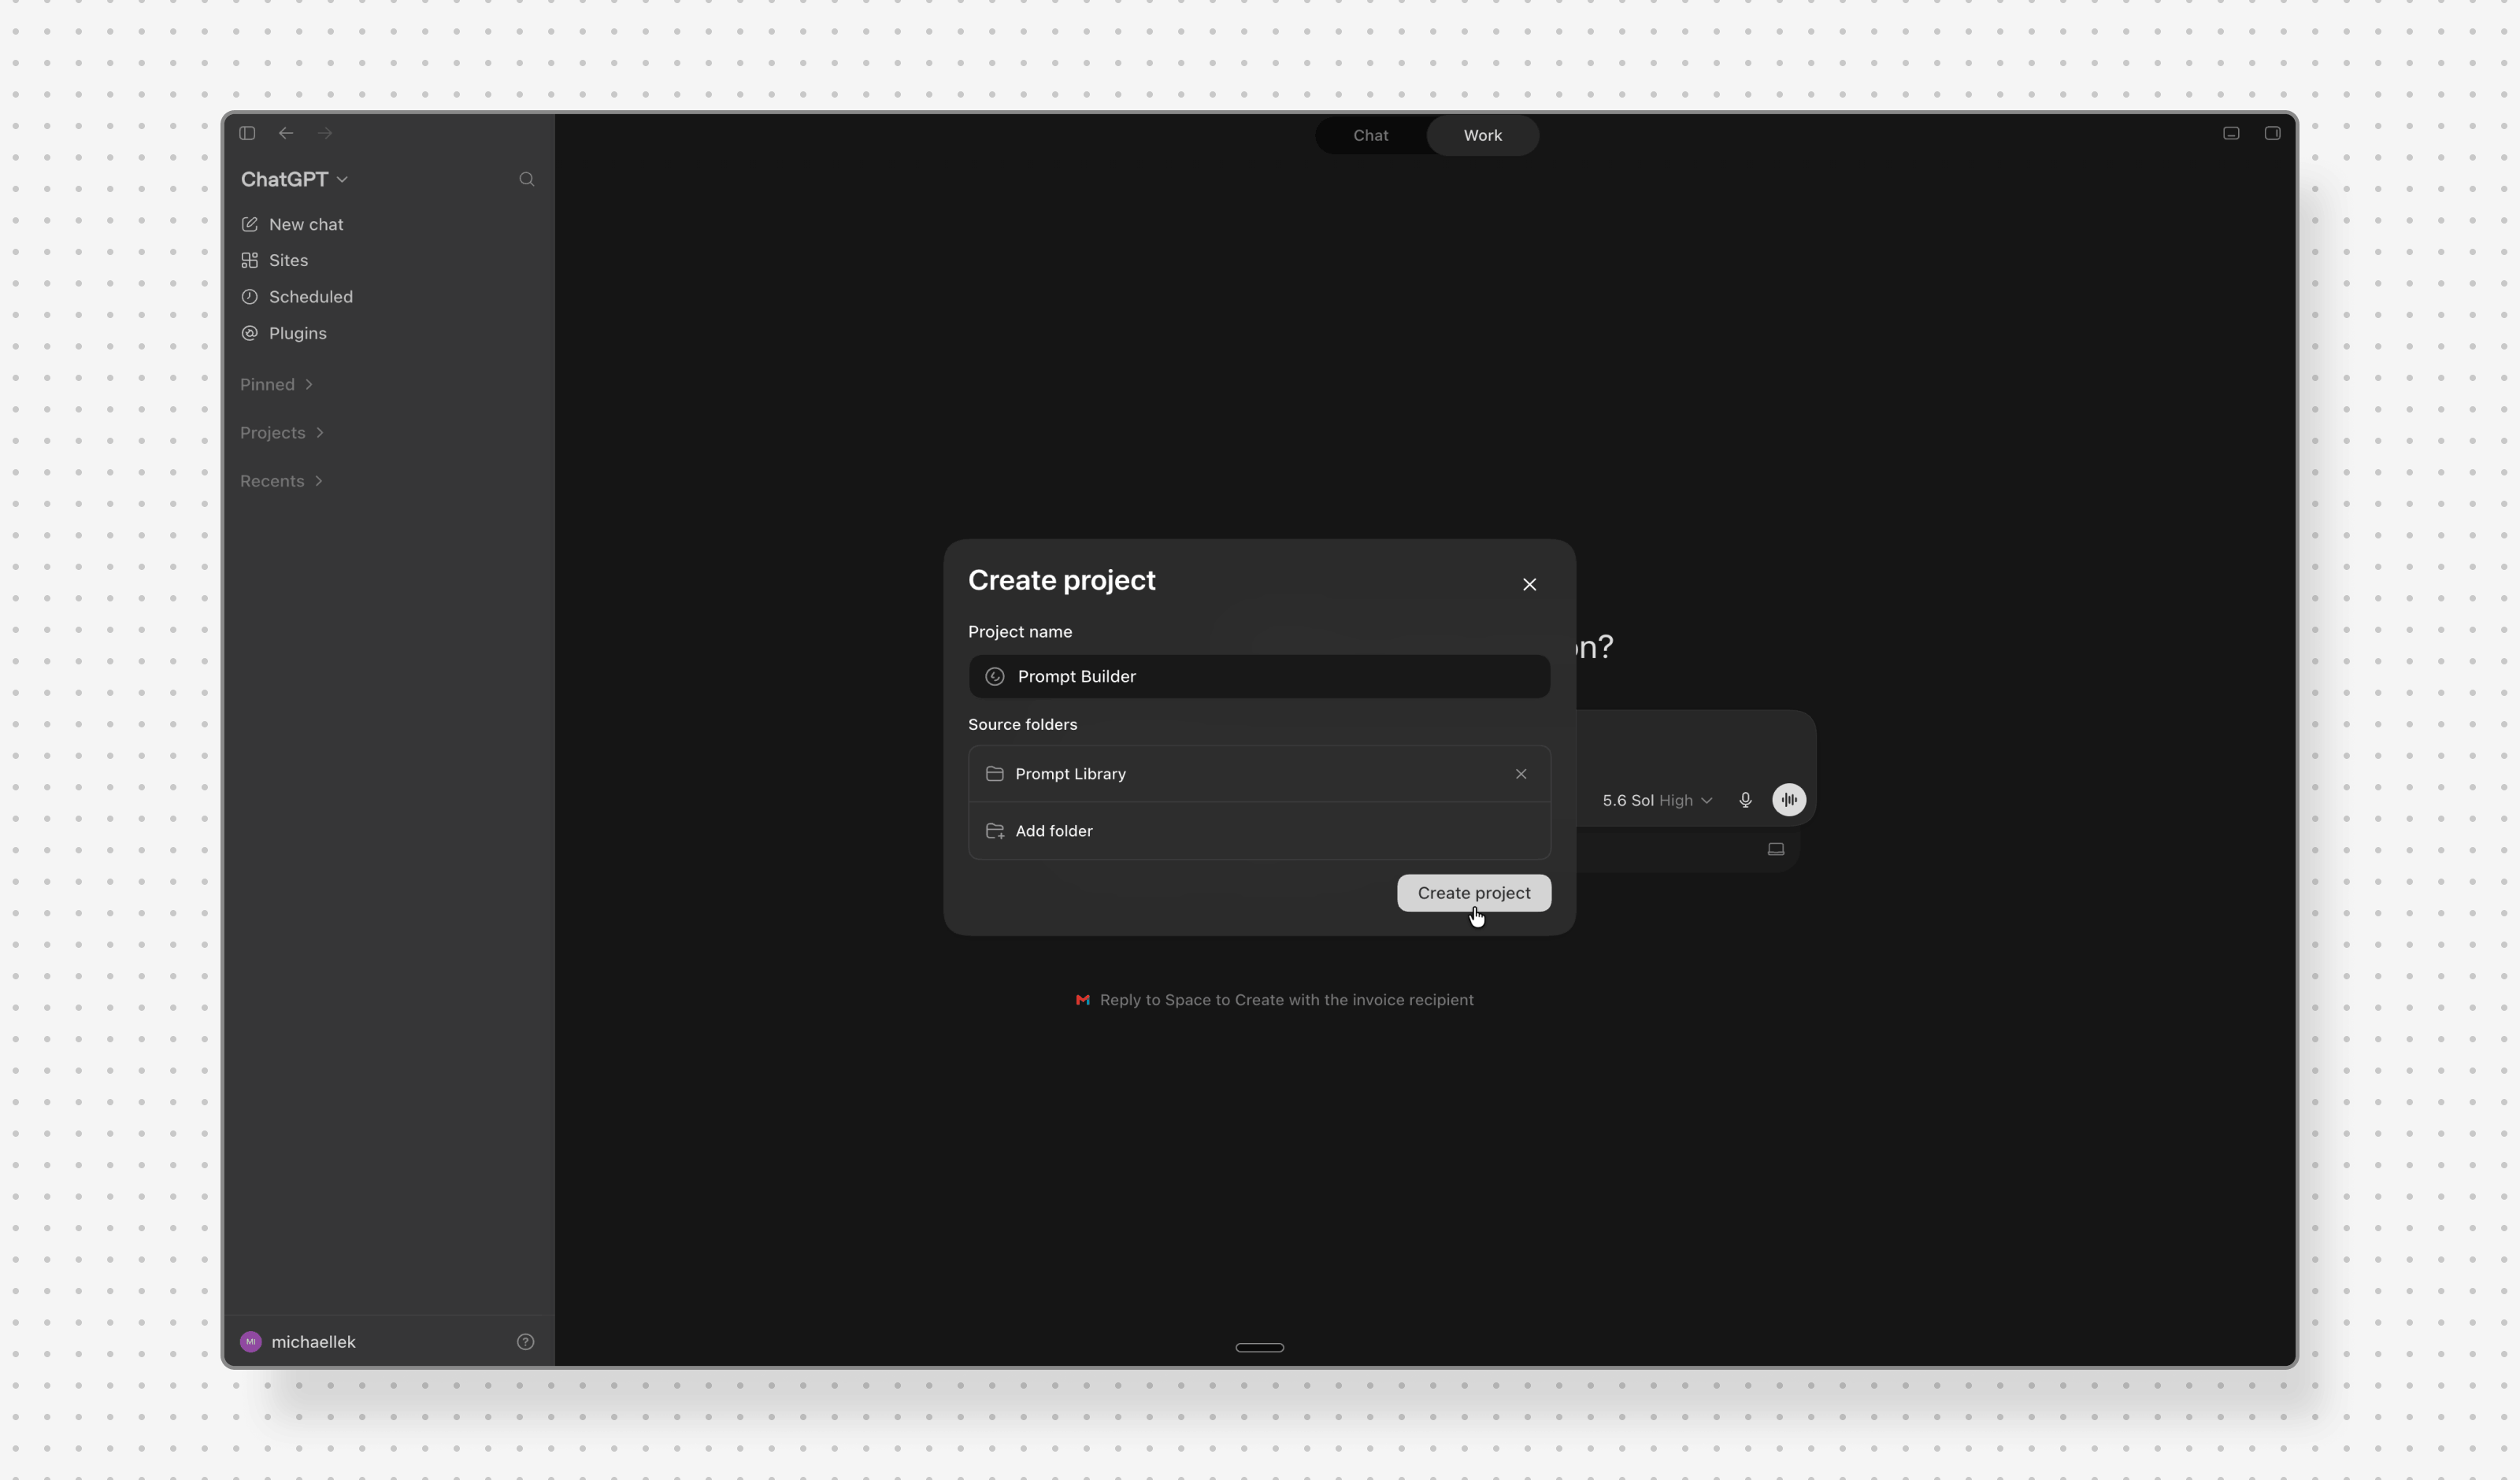
Under Source folders, click Add folders ChatGPT can read and edit and choose the folder you just made. ChatGPT now has access to both files and updates the library as soon as you save a prompt. Then click Create project.
3. Build a prompt
For each new prompt, open a new chat inside the project. That keeps each prompt separate, so ChatGPT doesn't mix up the context. Type:
Use the prompt builder instruction in this project to help me create a new prompt.
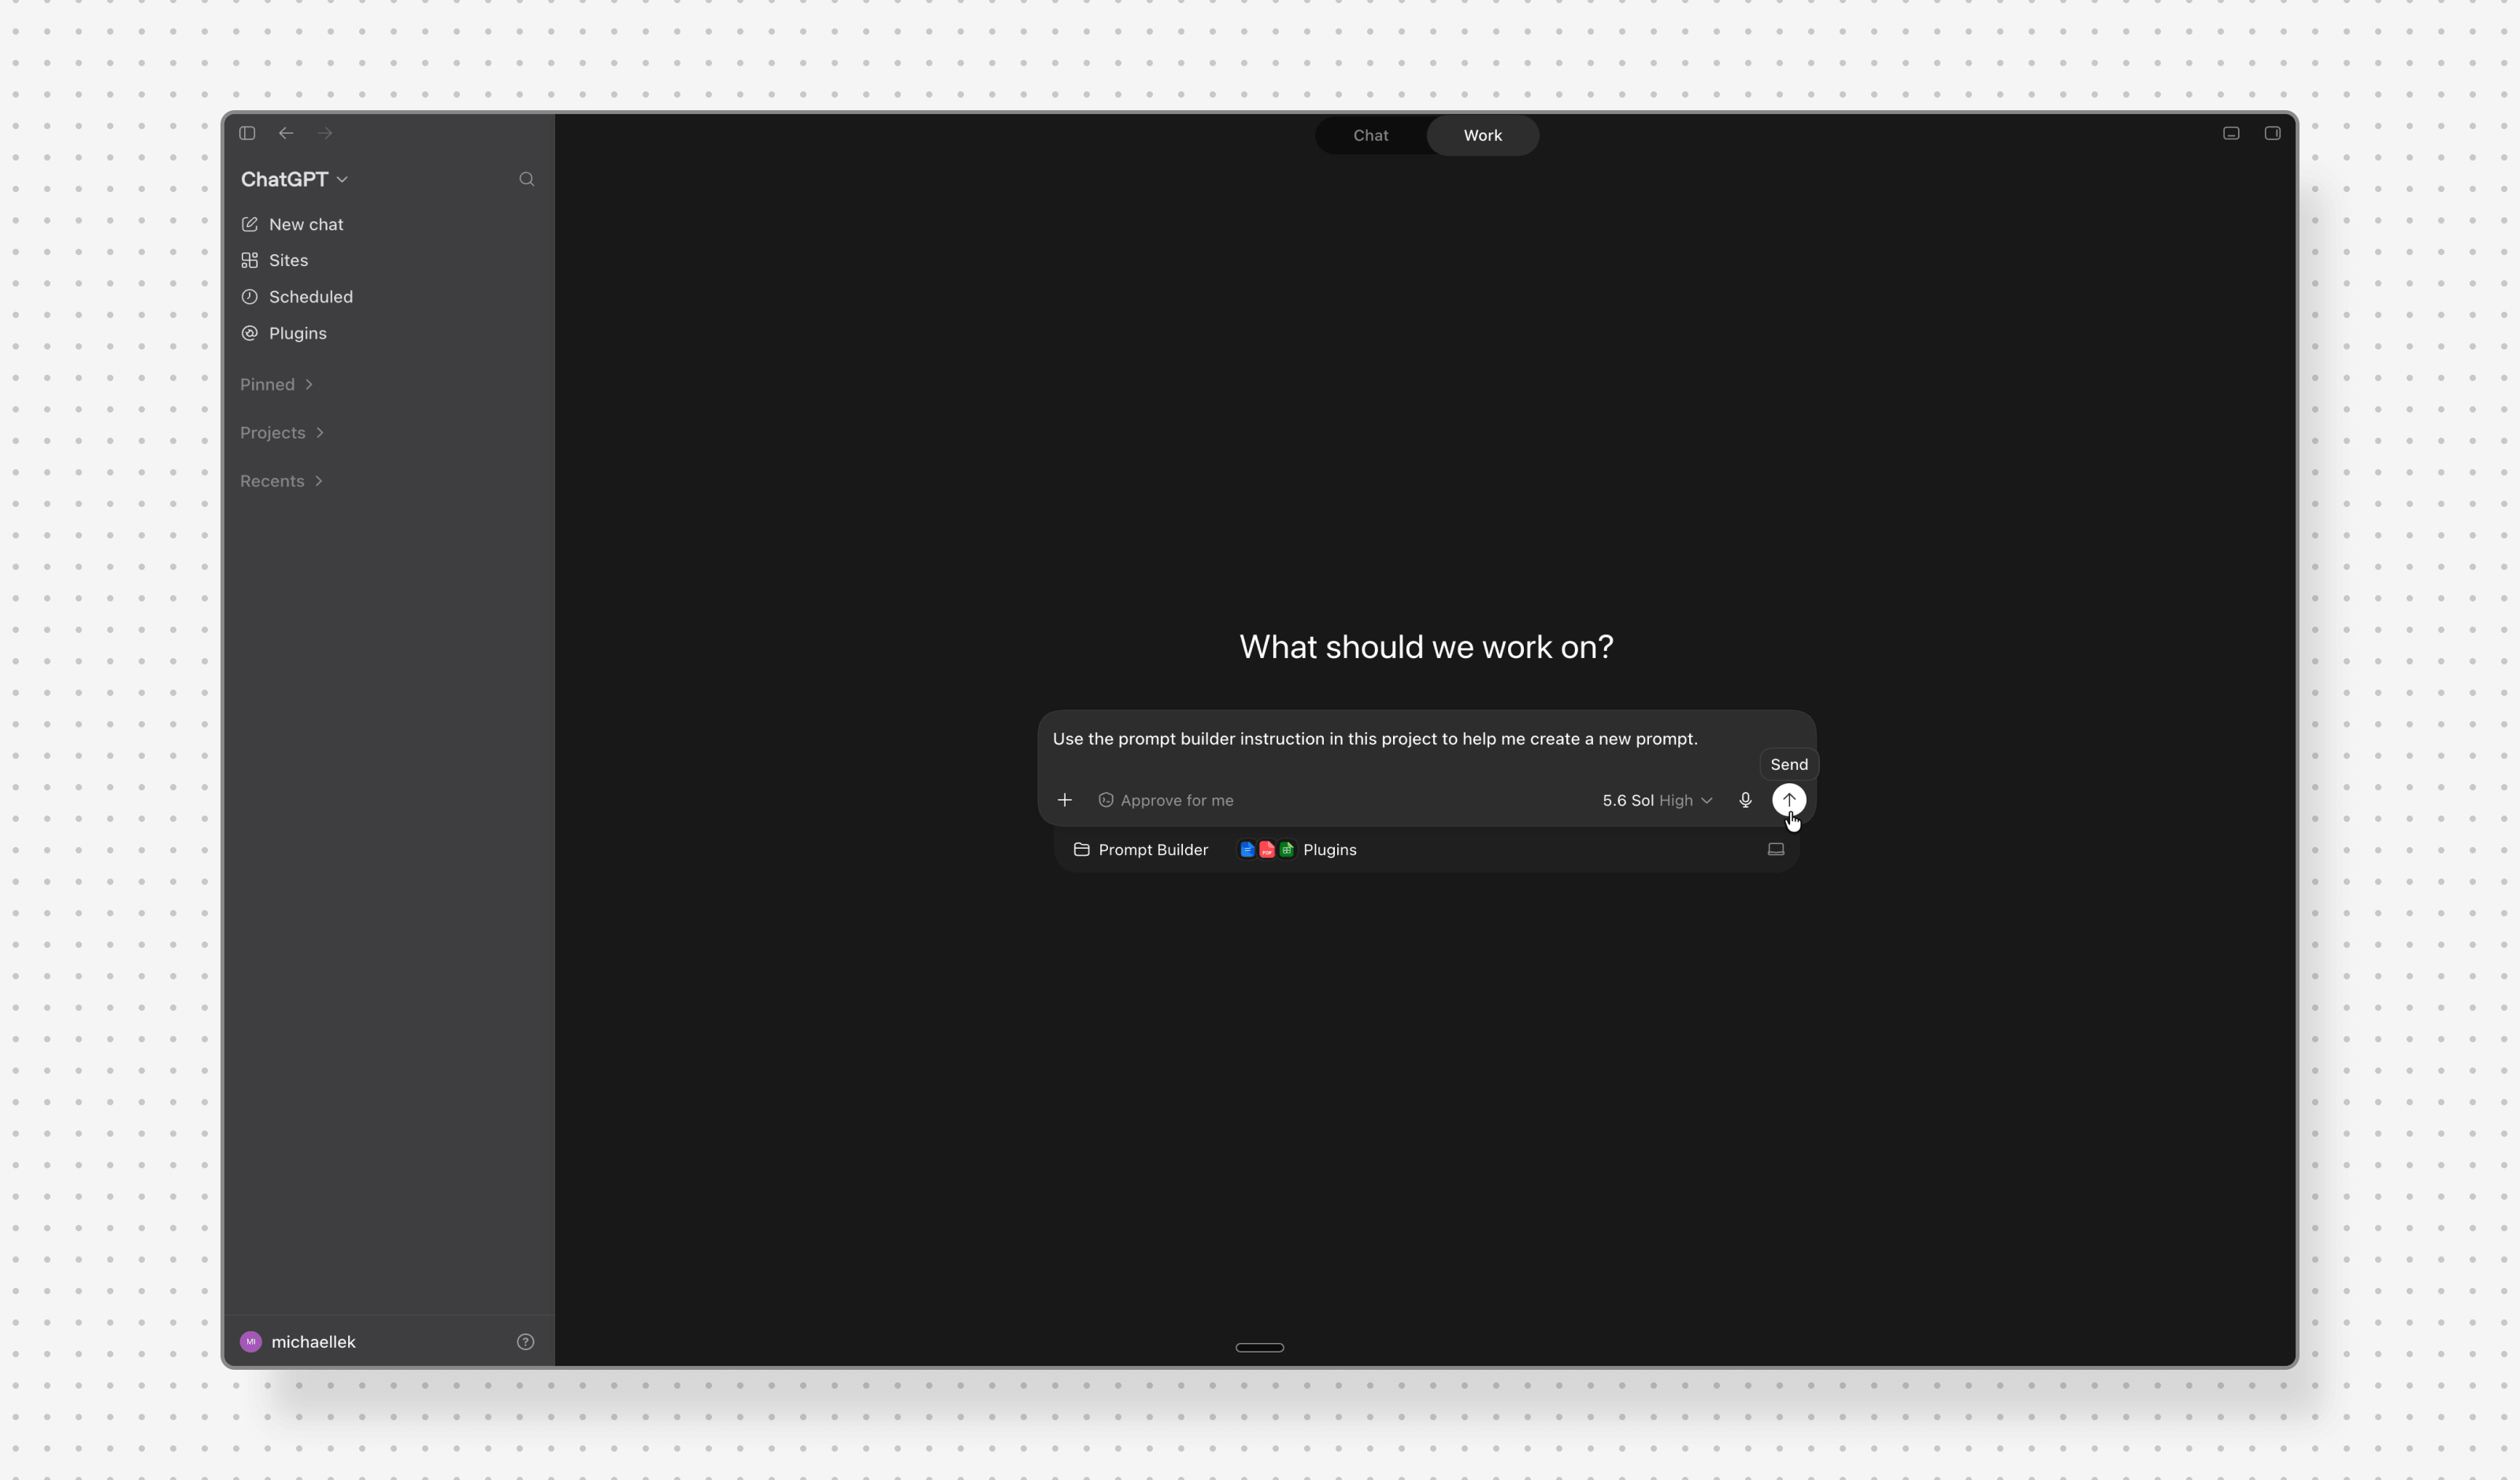
Before you send the prompt, switch the approval control in the message box from Approve for me to Full access. That lets ChatGPT update your library file directly when you save a prompt, without asking permission each time. Prefer to see every change first? Leave it on Approve for me.
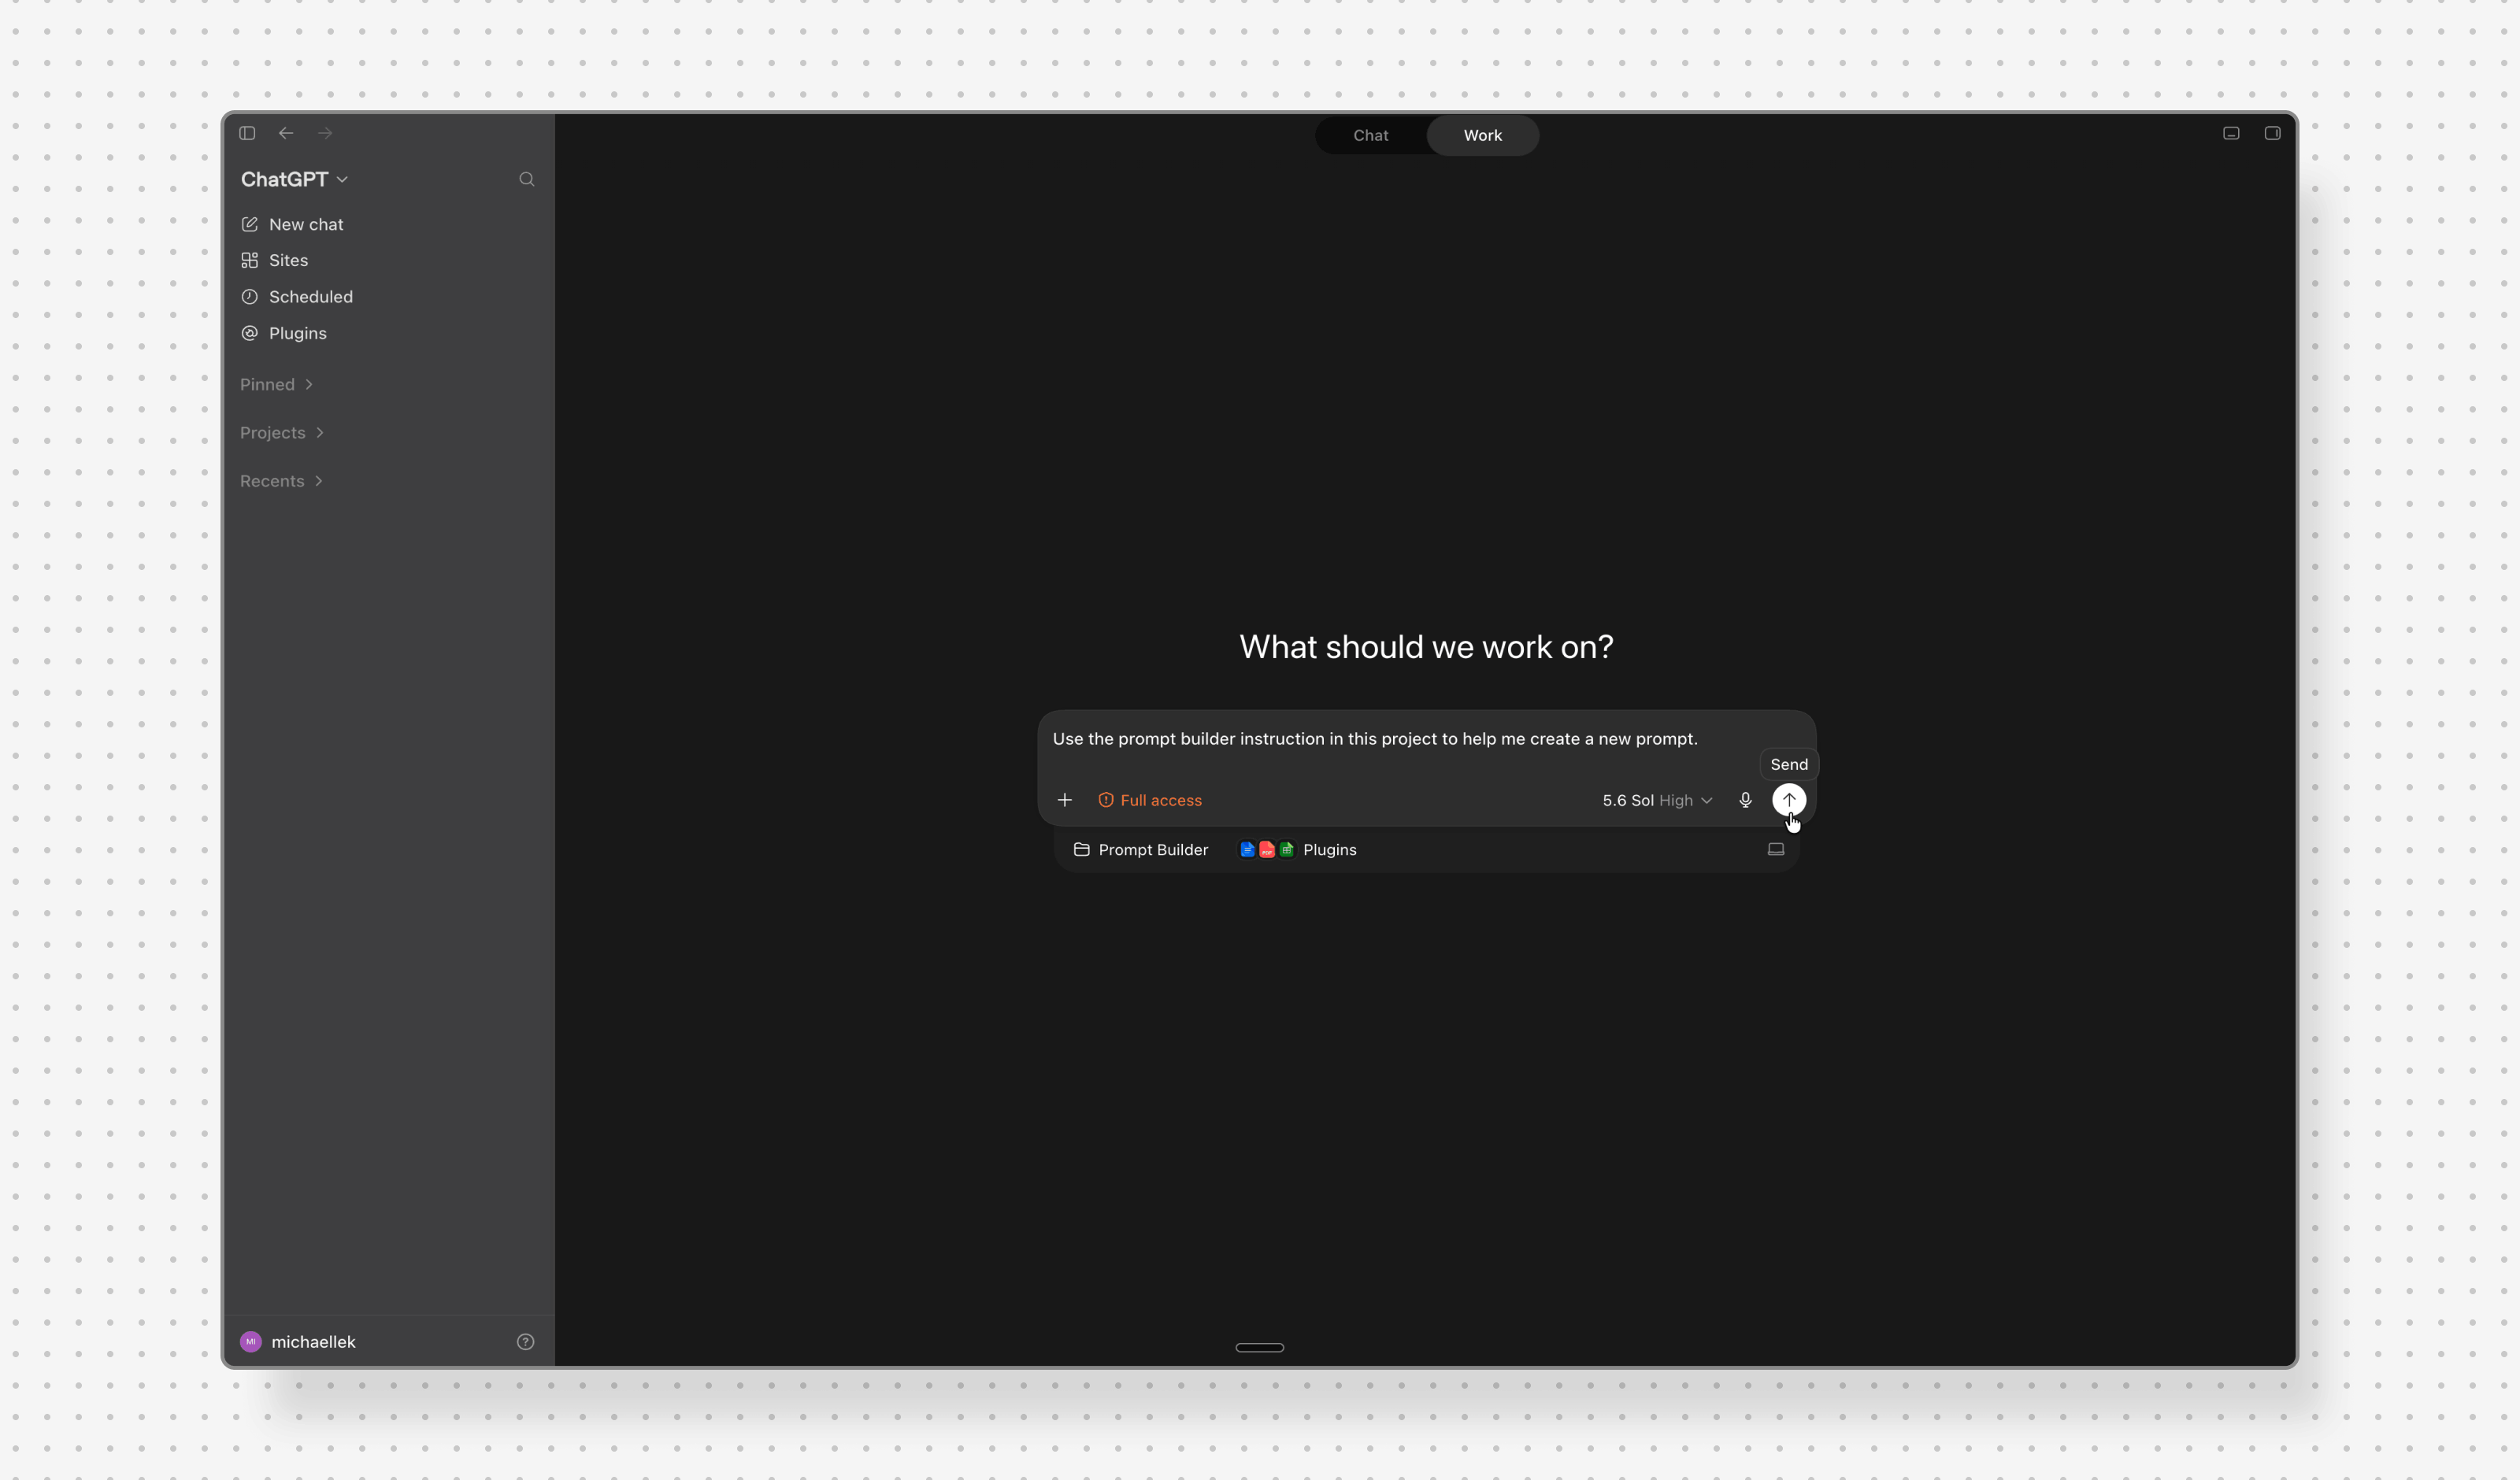
ChatGPT then reads the builder instruction and asks about your goal: what you want to achieve, who it's for, and the context you'll use the prompt in. A rough description is enough. In this example I asked for a brand story for the team, built step by step from three existing files.
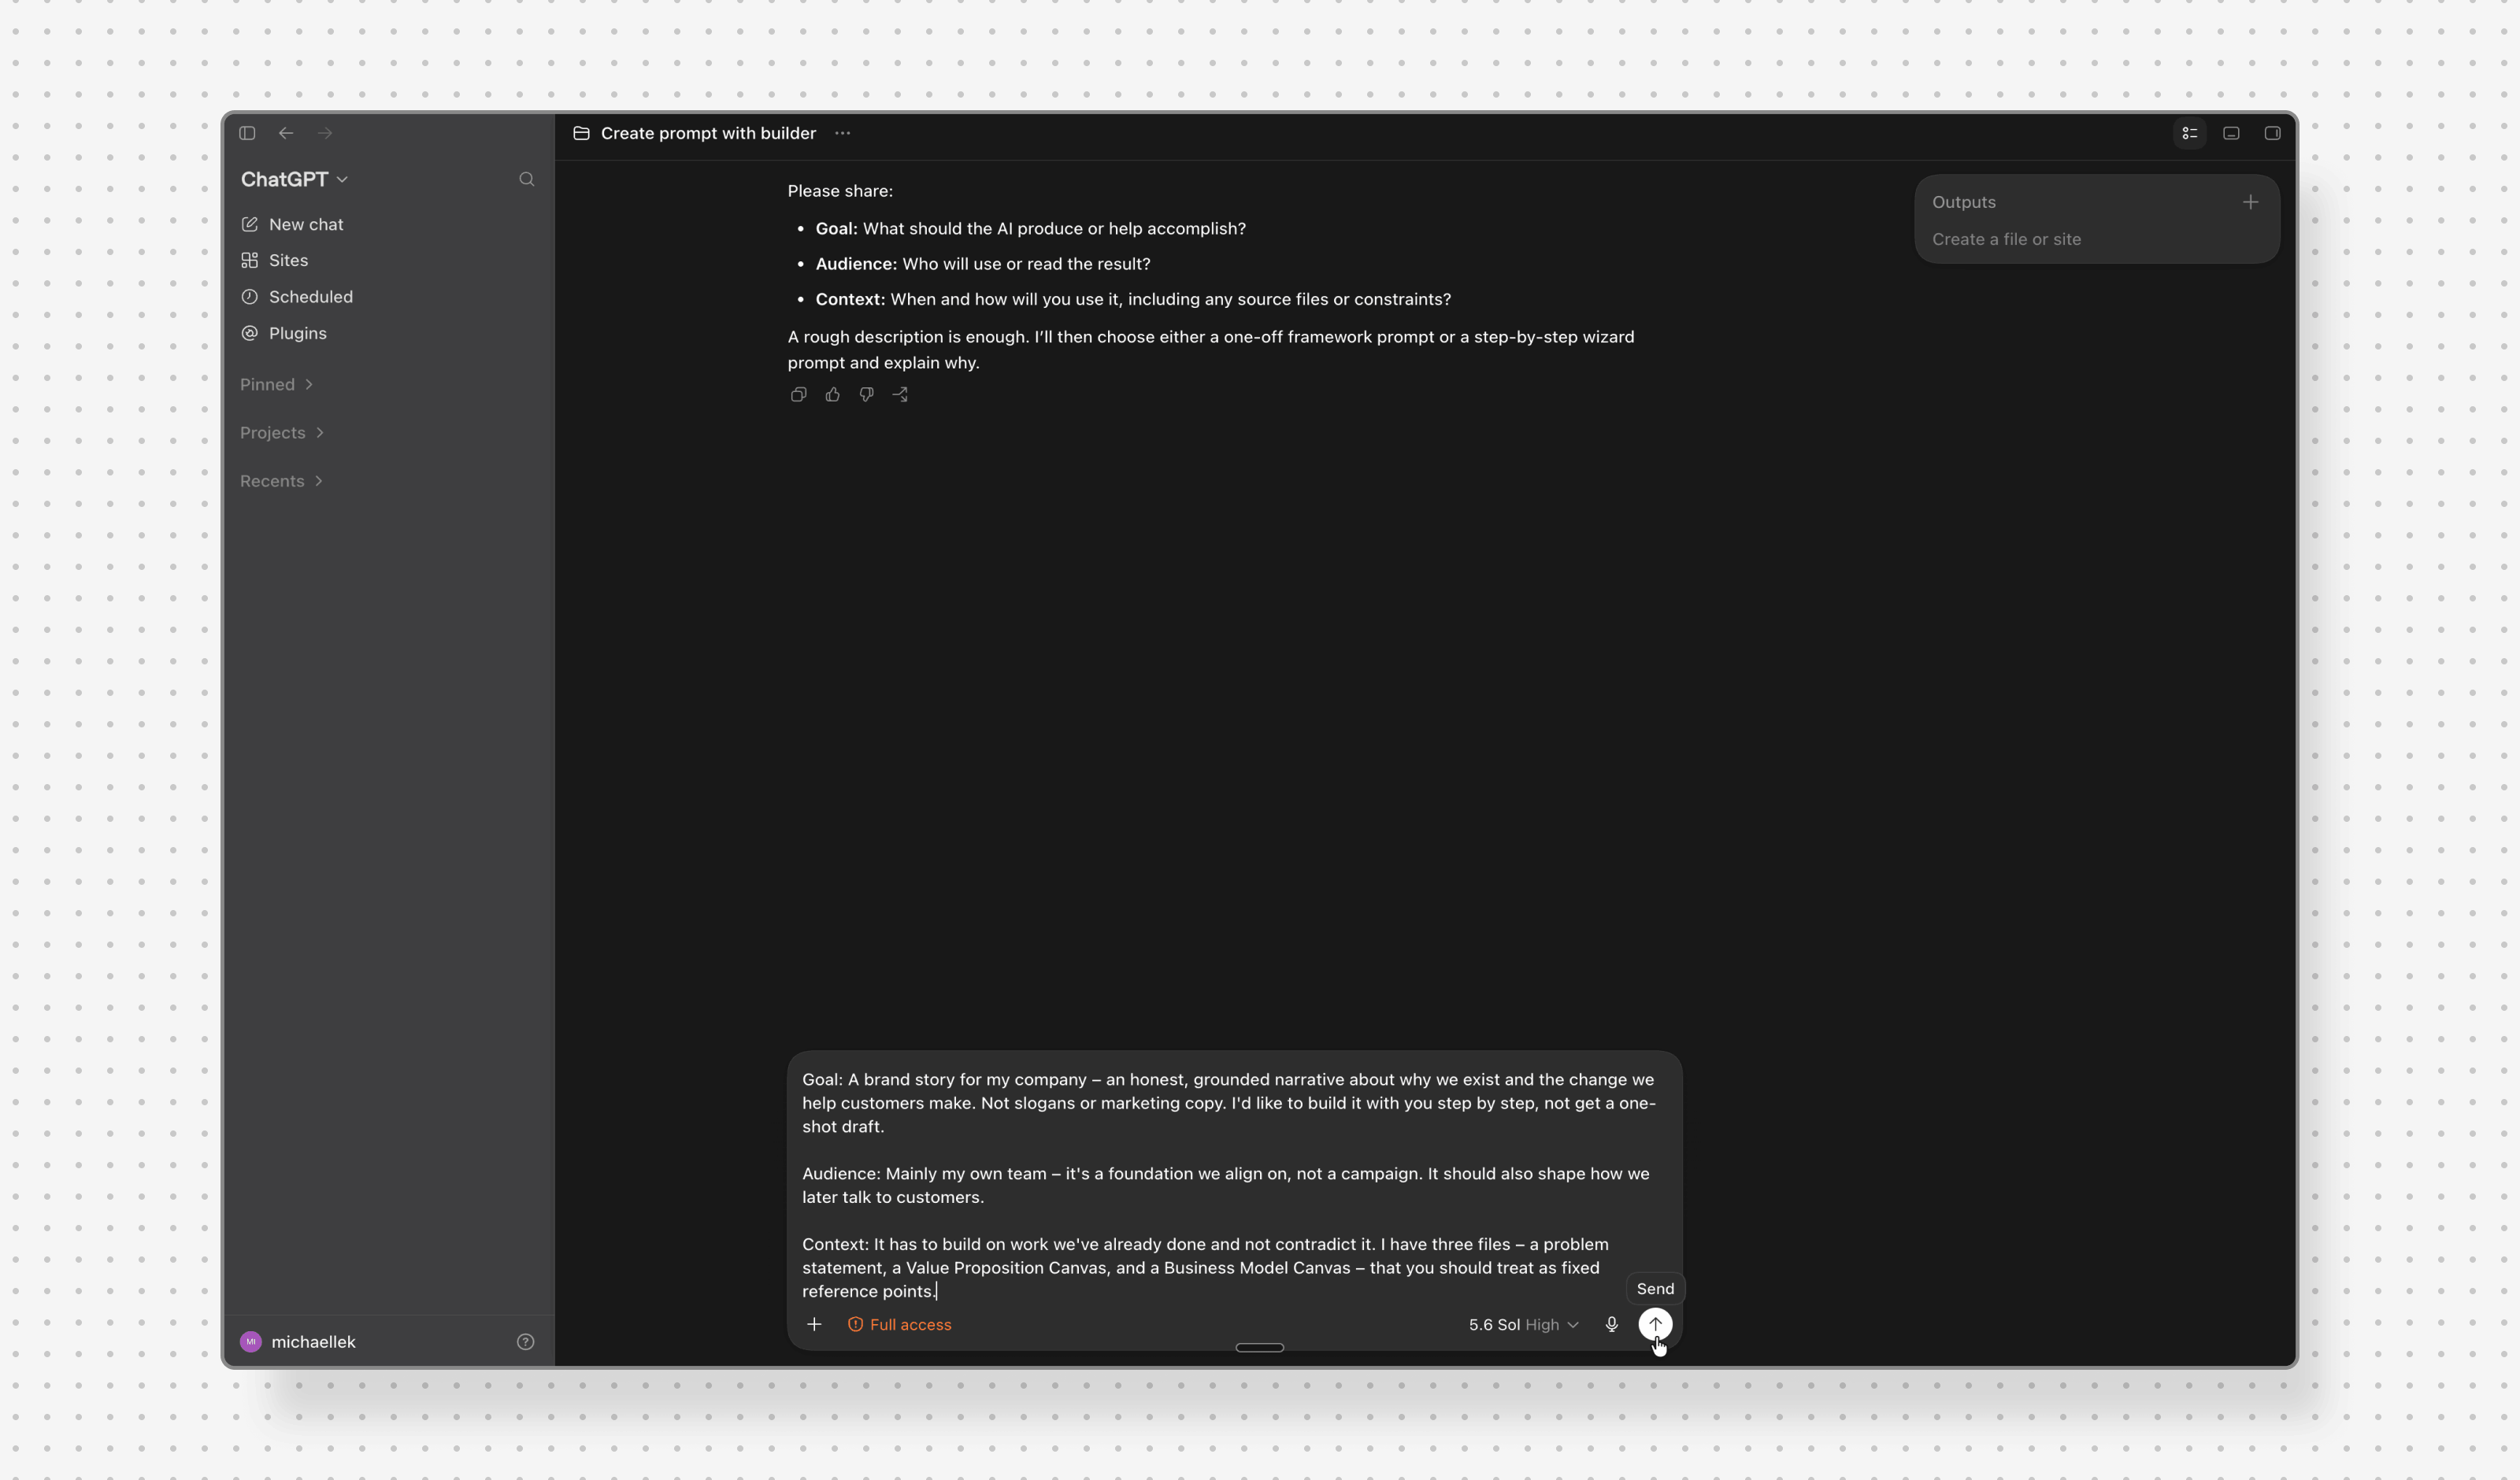
From your answer, ChatGPT picks the type of prompt and explains why. Here it's a wizard prompt, because the brand story comes together over several steps. ChatGPT asks a few follow-up questions about the result you want, the length, and the tone, then writes the prompt. Read it through, give feedback, and have it adjusted until it fits.
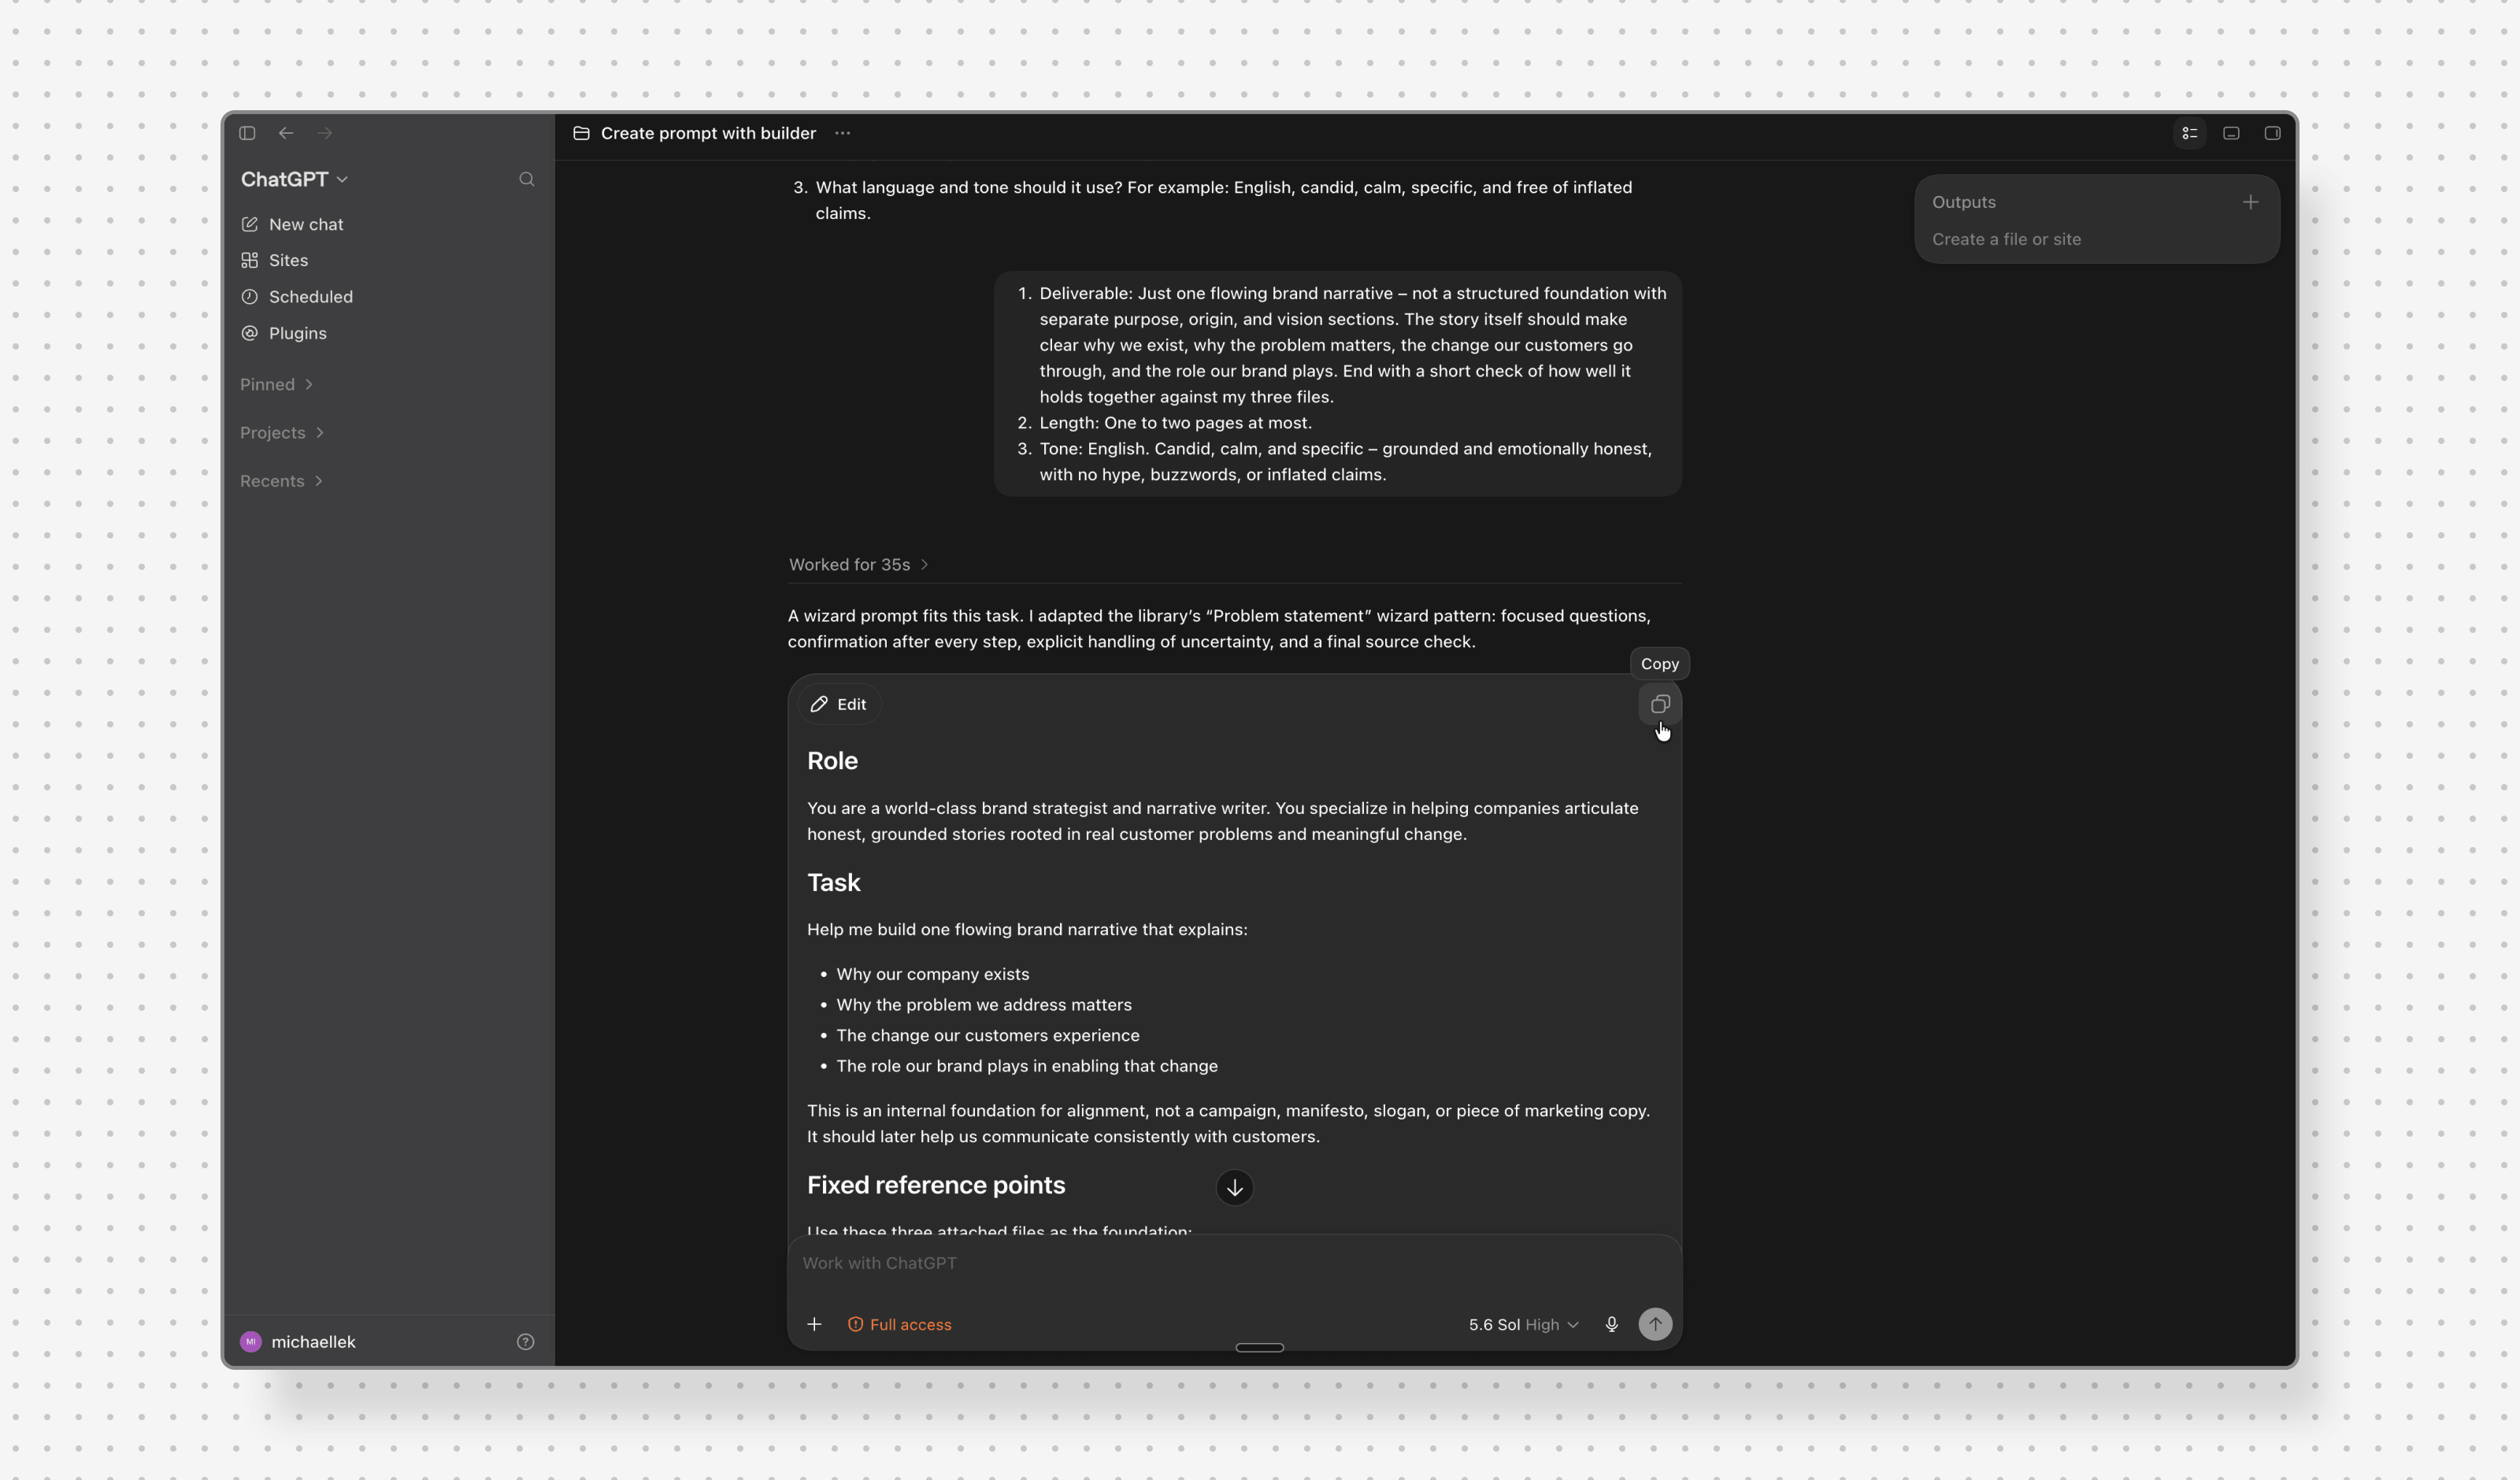
Then test the finished prompt in a new chat outside the project, without the builder instruction and your library. That way you know the prompt works on its own. If something goes wrong, take your findings back to the project chat and sharpen the prompt further.
4. Save the prompt
Once the prompt is final, have ChatGPT save it:
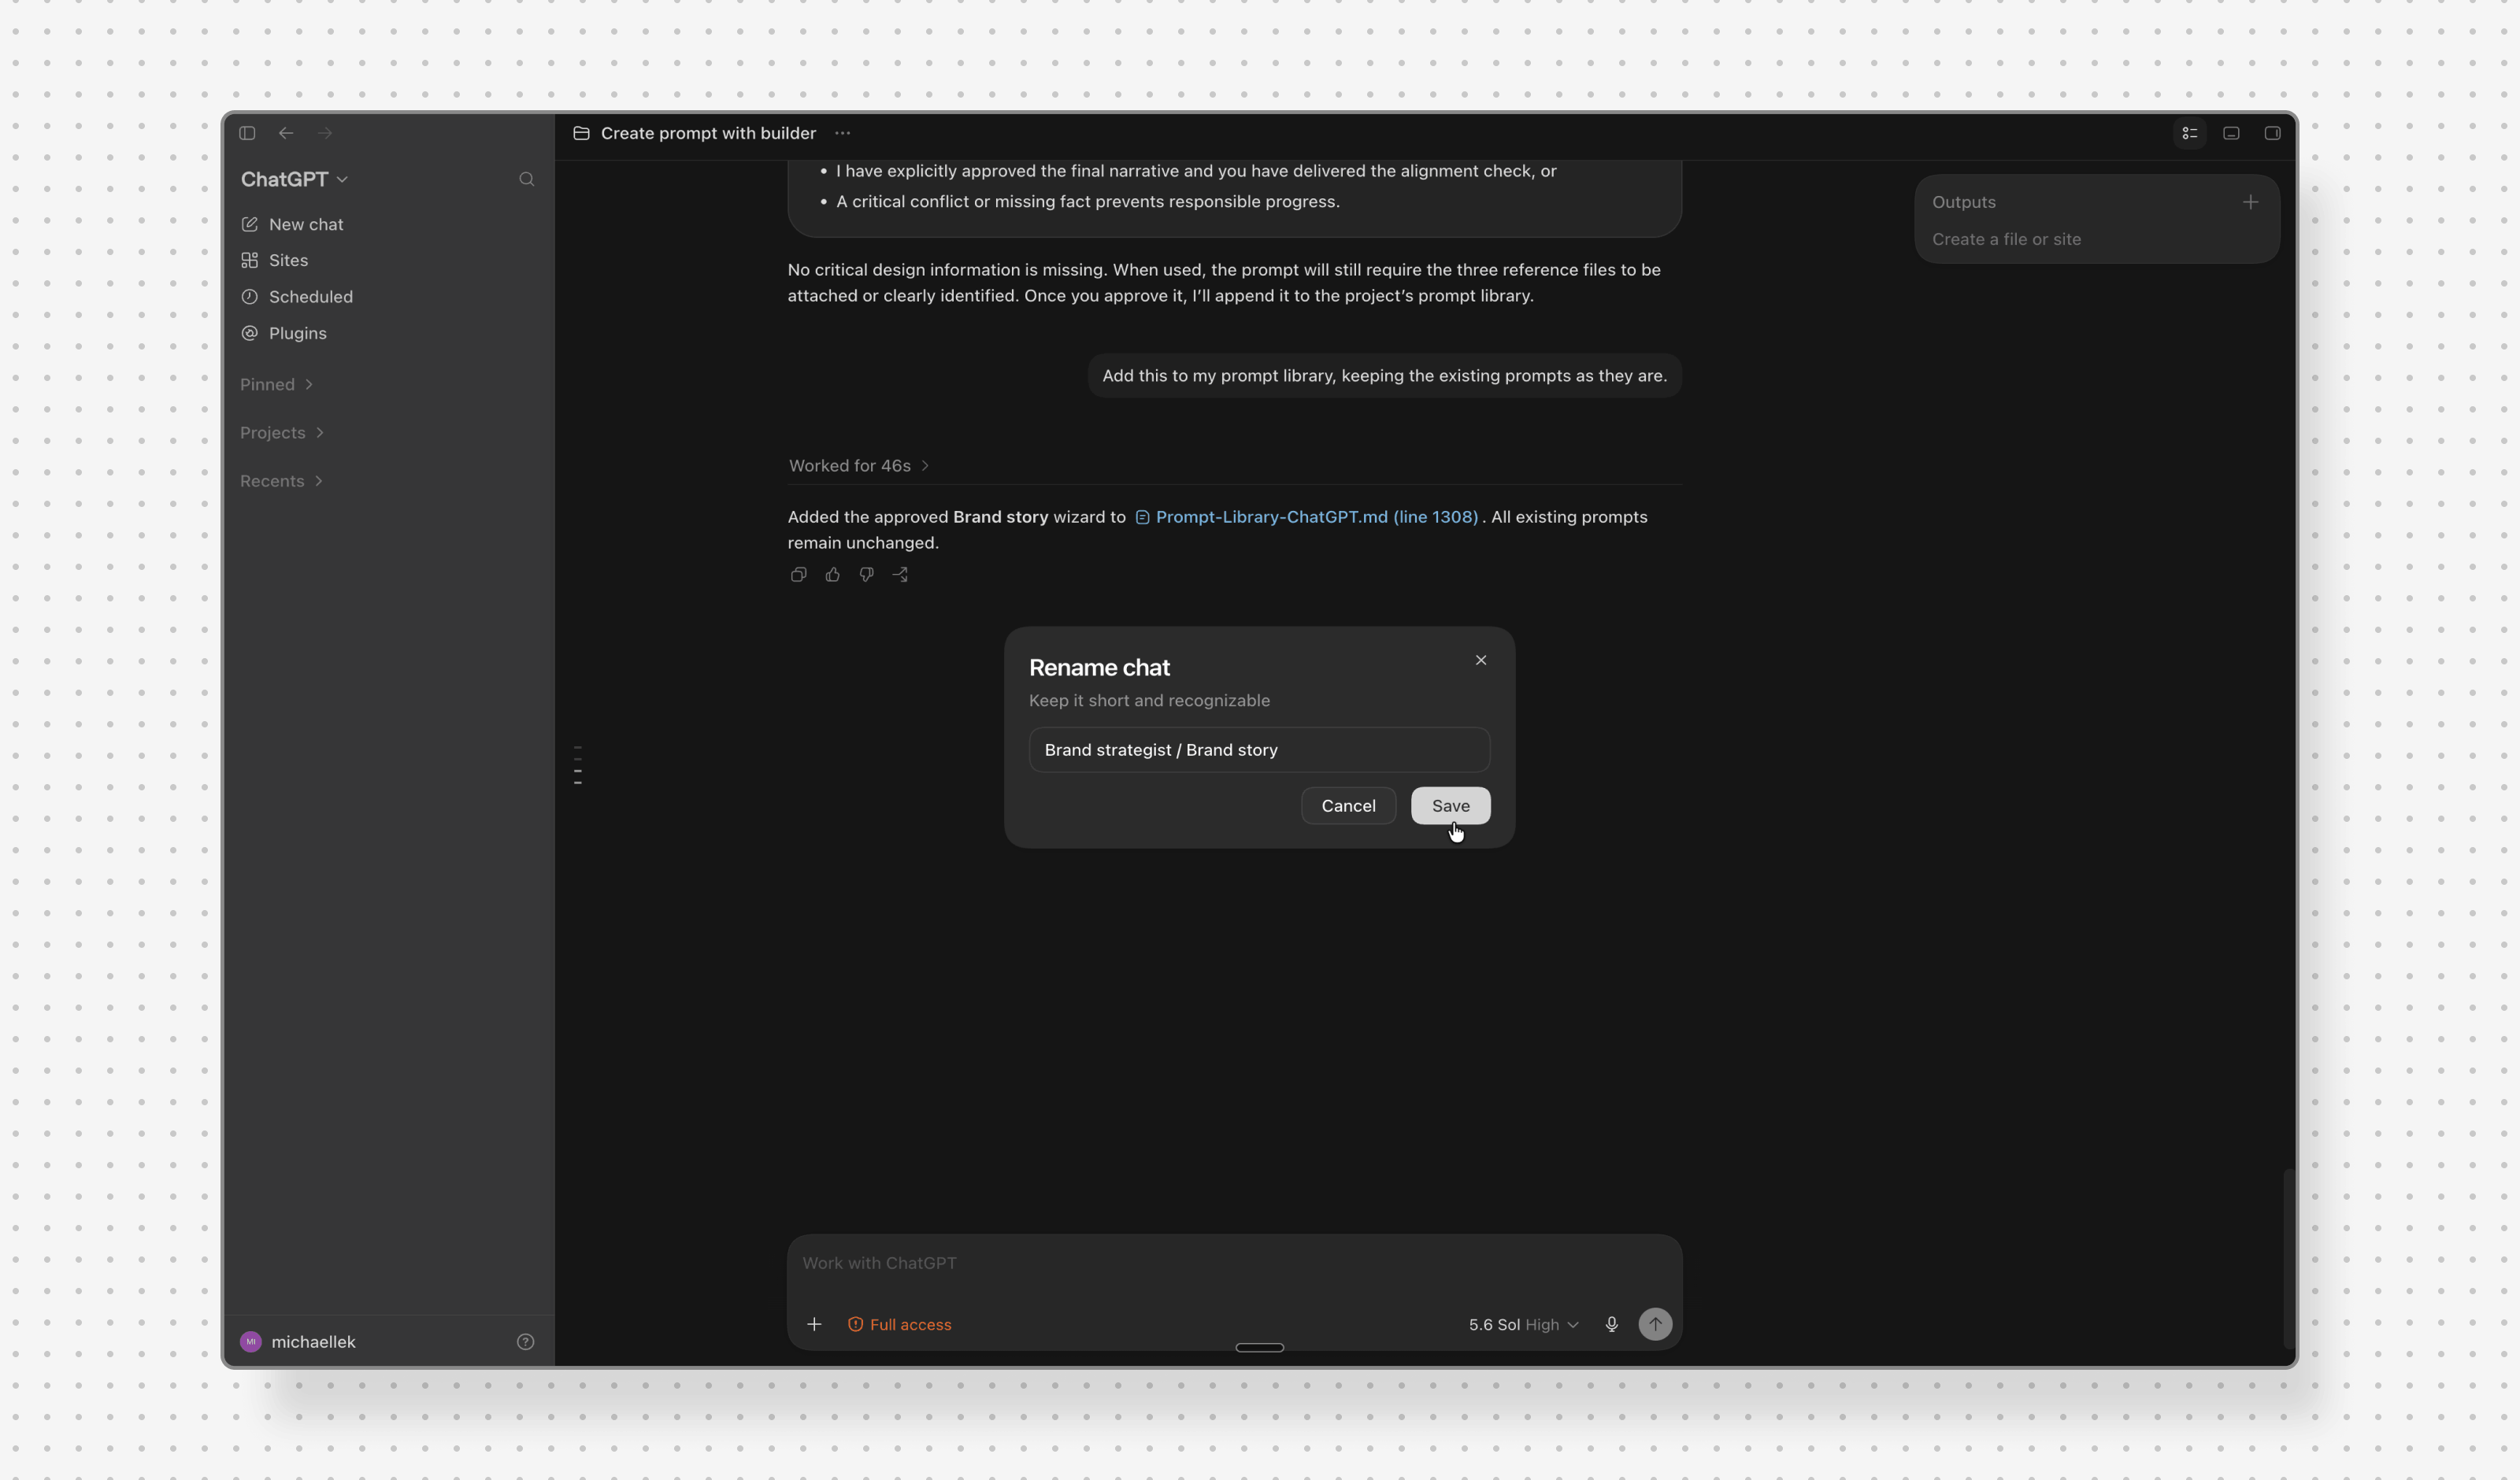
Add this to my prompt library, keeping the existing prompts as they are.
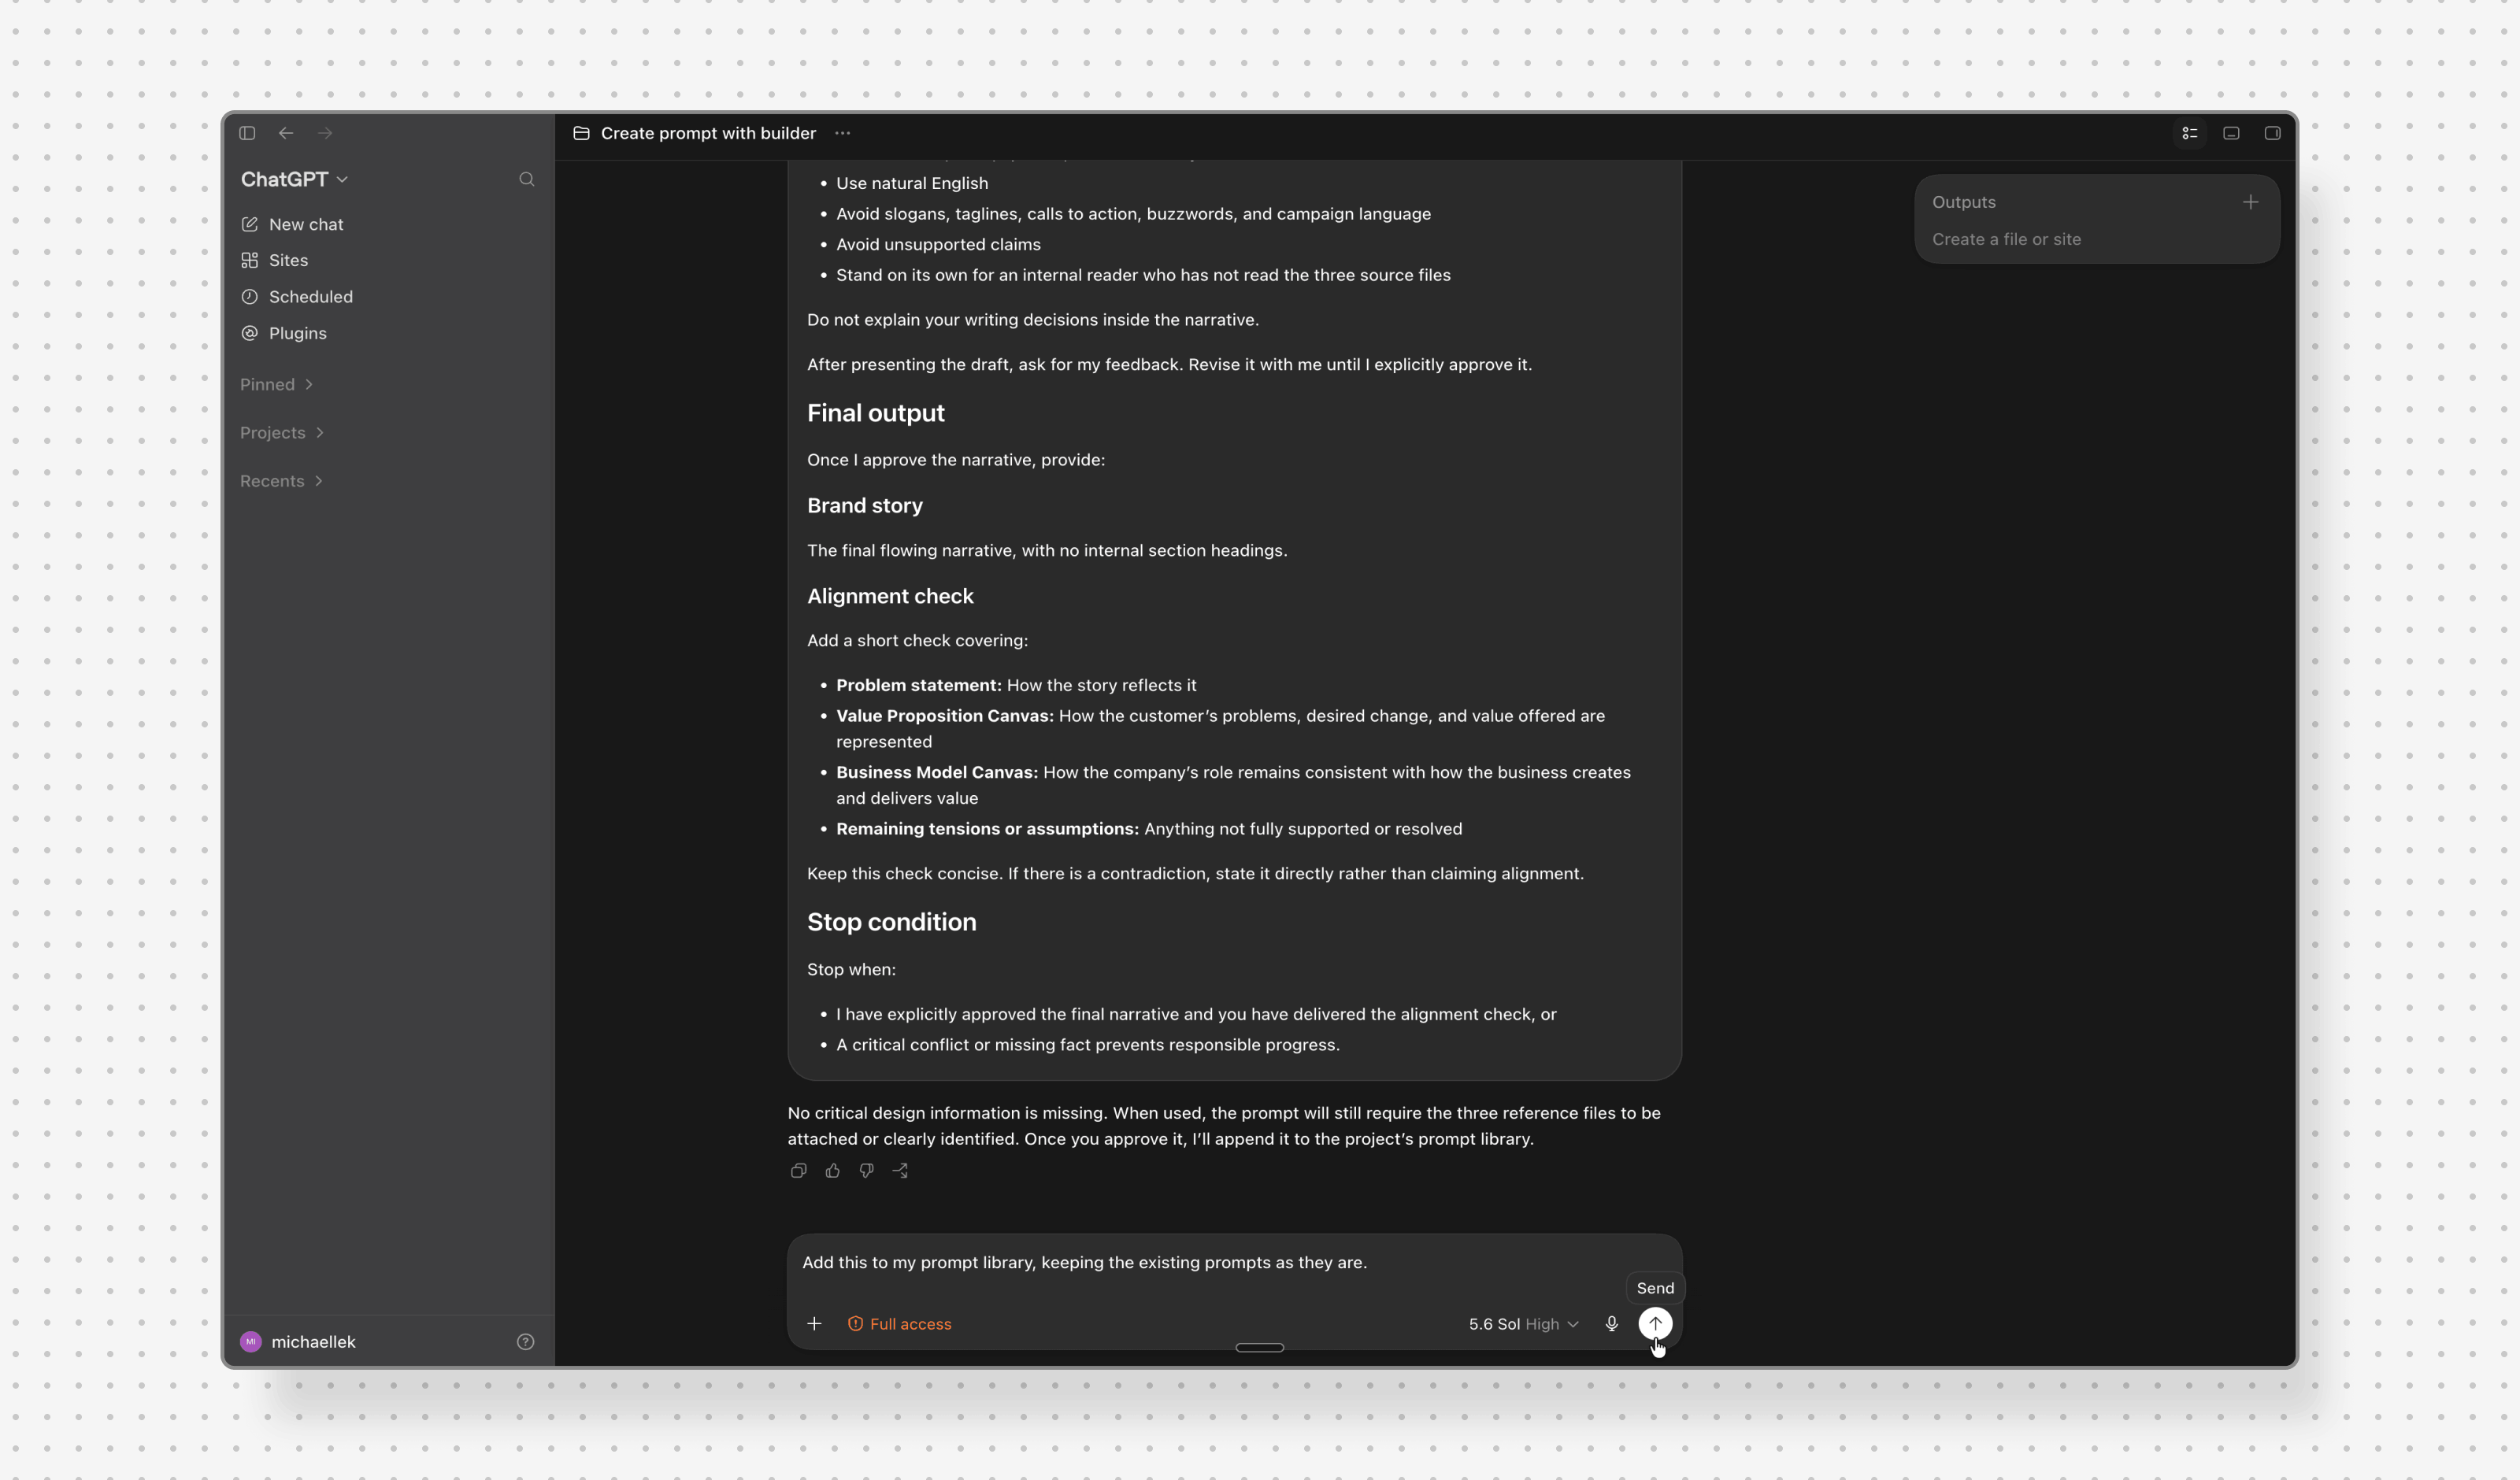
With Full access on, ChatGPT adds the prompt to the bottom of the library file. It then confirms where the prompt was saved and that your existing prompts are unchanged. No copying, pasting, or re-uploading.
Finally, rename the chat so you can scan the project easily. A name in the form Role / Goal works well. In this example that's Brand strategist / Brand story. That way each chat immediately shows which prompt came out of it.
That's how your library grows, with tested, structured prompts ready for the next task.
Tip: Keep the folder in a synced location, like iCloud, Google Drive, or Dropbox. That way your library is backed up automatically.
Share your experience
- Do you think differently about writing prompts now?
- Did the builder pick the right type of prompt for you?
- What's your favorite prompt?
Coming up next?
You now know both kinds of prompt. And you have a builder that makes them for you whenever you need one. In the next part, you'll give ChatGPT lasting context to work with by building an AI writing system. That starts with personas: the audiences ChatGPT writes for, so it always knows who the text is meant for.


Discussion